


Table of contents
- Introduction:
- How do I get this Idea?
- How much did I struggle during implementation?
- Step 1 : We will created the Electron-Vite project.
- Step 2 : Create the python folder for our Django as backend.
- Step 3: Create the Custom Models, Serializers, and Views
- Step 4: Create API endpoints for our Backend
- Step 5: Connect the electron and Django via URLs
- Step 6: Run Backend with the Frontend Together
Introduction:
How do I get this Idea?
When I was doing the Student Management system for my previous IGCSE teacher, the main thing I found was that I couldn't possibly align with my previous teacher's demands, which are like want the interface application and want to host the website also. So, I got an idea like this; "what will happen if I can combine the Electron and Django?"
How much did I struggle during implementation?
At first, it was not easy, I got a lot of errors like the backend server did not respond with the cookies and when it was fixed the electron did not accept the response from the backend server, and more importantly the cookies were not set.
Step 1 : We will created the Electron-Vite project.
Firstly, we will give our project name as Dlentron (Django + electron) and mostly you can choose up to (Vanilla, Vue, React, Svelte, and Solid) but in this post, we will choose the react. Select the Yes on typescript, Yes on add electron updater plugin, Yes to download mirror proxy!
npm create @quick-start/electron

√ Project name: ... Dlentron
√ Package name: ... dlentron
√ Select a framework: » react
√ Add TypeScript? ... No / ( Yes )
√ Add Electron updater plugin? ... No / ( Yes )
√ Enable Electron download mirror proxy? ... No / ( Yes )

Scaffolding project in C:\Users\hanht\Desktop\Dlentron\Dlentron...

Done. Now run:
  cd Dlentron
  npm install
  npm run dev

# test the electron vite project
cd  .\Dlentron
npm install
npm run dev
Installation may take some times like 3 minutes or 5 minutes.
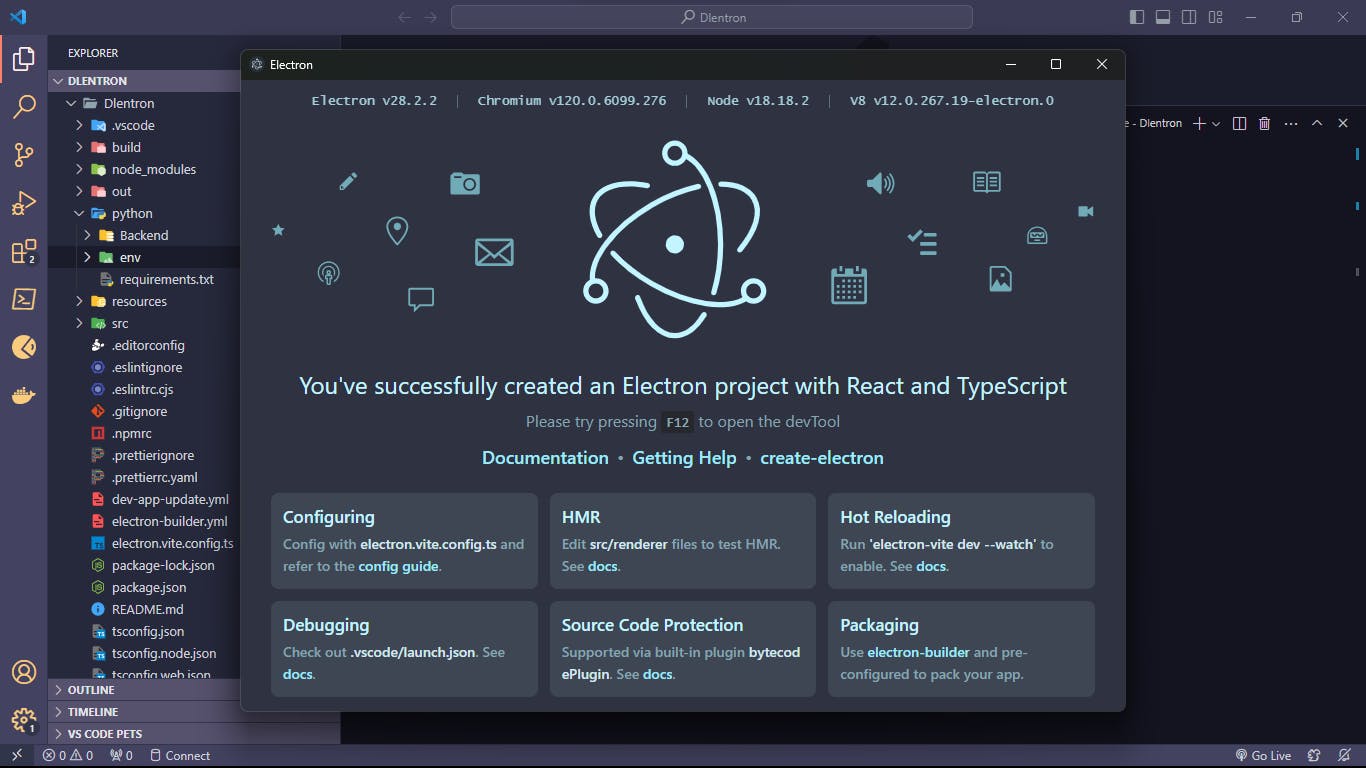
And done, we have created the Electron-Vite project template.
Step 2 : Create the python folder for our Django as backend.
Close the electron app and go back to our terminal and create the python folder in your Dlentron folder.
mkdir python
After that, we will create the Django project in the python folder by this commands. Before that I use these version for my Django projects (Django 4.2.6, django-cors-headers 3.13.0, djangorestframework 3.14.0, pyinstaller 6.3.0, python-dotenv 1.0.0) you can look in this requirements list .
# change dir to python folder and create the virtual environment
cd python && python -m venv env
# activate the virtual environment
.\env\Scripts\activate
# install the dependencies
pip install Django djangorestframework django-cors-headers pyinstaller python-dotenv
# install the jwt also for auth tokens
pip install djangorestframework-simplejwt
And we will create the Django project and named as Backend:
# create the django project
django-admin startproject Backend && cd Backend
# create the app for api
python .\manage.py startapp DApi
So, now we have created the electron and Django project together.
Step 3: Create the Custom Models, Serializers, and Views
Open the Backend/urls.py file and add this line for our DApi.
from django.contrib import admin
from django.urls import path, include

urlpatterns = [
    path('admin/', admin.site.urls),
    path('api/', include('DApi.urls'))
]
And create the new urls.py file in DApi folder and add the each URLs for each Views.
cd .\DApi\

New-Item -Path . -Name "urls.py" -ItemType "file"
New-Item -Path . -Name "serializers.py" -ItemType "file"
from django.urls import path
from .views import RegisterView, LoginView, UserView, UserLogout

urlpatterns = [
    path('register', RegisterView.as_view(), name='register'),
    path('login', LoginView.as_view(), name='login'),
    path('user', UserView.as_view(), name='user'),
    path('logout', UserLogout.as_view(), name='logout')
]
Before create the views, we need to create the custom user model and serializers.
And now, we will create the Custom User Manager and Custom User in model file like this, so we can fully control our user:
from django.db import models
from django.contrib.auth.base_user import BaseUserManager
from django.contrib.auth.models import AbstractUser, PermissionsMixin
# Create your models here.

class CustomUserManager(BaseUserManager):
    def create_user(self, email, password=None, **extra_fields):
        """ Create and return a regular user with an email and password. """
        if not email:
            raise ValueError('The Email field must be set')
        email = self.normalize_email(email)
        self.check_user(email)
        user = self.model(email=email, **extra_fields)
        user.set_password(password)
        user.save(using=self._db)
        return user

    def create_superuser(self, email, password=None, **extra_fields):
        extra_fields.setdefault('is_superuser', True)
        extra_fields.setdefault('is_staff', True)
        return self.create_user(email, password, **extra_fields)

    def check_user(self, email):
        user = not CustomUser.objects.filter(email=email).exists()
        return user

class CustomUser(AbstractUser, PermissionsMixin):
    id = models.AutoField(primary_key=True)
    email = models.EmailField(max_length=50, unique=True)
    username = models.CharField(max_length=50)

    USERNAME_FIELD = 'email'
    REQUIRED_FIELDS = ['username']
    objects = CustomUserManager()

    def __str__(self):
        return self.username
After that add this line in settings.py file to enable the default user as our custom user model.
AUTH_USER_MODEL = 'DApi.CustomUser'
Create serializers for custom user registration, login and view.
from rest_framework import serializers
from django.contrib.auth import get_user_model, authenticate

User = get_user_model()

class UserRegisterSerializer(serializers.ModelSerializer):
    class Meta:
        model = User
        fields = ['username', 'email', 'password']

    def create(self, clean_data):
        user_obj = User.objects.create_user(
            email=clean_data['email'],
            password=clean_data['password'],
            username=clean_data['username']
        )
        return user_obj

class UserLoginSerializer(serializers.Serializer):
    email = serializers.EmailField()
    password = serializers.CharField()

    def check_user(self, clean_data):
        email = clean_data['email']
        password = clean_data['password']
        user = authenticate(username=email, password=password)
        if not user:
            raise ValueError("User does not exist!")
        return user

class UserSerializer(serializers.ModelSerializer):
    class Meta:
        model = User
        fields = ('username', 'email')
And after that create view for them. And login function will return the tokens to ensure to stay the login for each week.
from rest_framework_simplejwt.tokens import RefreshToken
from django.contrib.auth import login, logout
from rest_framework.views import APIView
from rest_framework.response import Response
from .serializers import UserRegisterSerializer, UserLoginSerializer, UserSerializer
from rest_framework import permissions, status
from rest_framework.exceptions import AuthenticationFailed
from .custom_validations import custom_validation, validate_email, validate_password
from rest_framework_simplejwt.authentication import JWTAuthentication as BaseJWTAuthentication

class JWTAuthentication(BaseJWTAuthentication):
    """
    Custom JWT authentication class.
    It support for checking access tokens stored in cookies if not found in the Authorization header.
    """

    def authenticate(self, request):
        # Check the Authorization header first
        header = self.get_header(request)
        if header is not None:
            raw_token = self.get_raw_token(header)
            validated_token = self.get_validated_token(raw_token)
            user = self.get_user(validated_token)
            return user, validated_token

        # If no token in the Authorization header, check cookies
        else:
            raw_token = request.COOKIES.get('access_token')
            if raw_token is not None:
                validated_token = self.get_validated_token(raw_token)
                user = self.get_user(validated_token)
                return user, validated_token

        return None


def generate_tokens(user):
    """    Generate access and refresh tokens for a given user    """
    refresh = RefreshToken.for_user(user)
    return {
        'refresh': str(refresh),
        'access': str(refresh.access_token),
    }


class RegisterView(APIView):
    """    View for user registration    """
    permission_classes = (permissions.AllowAny,)

    def post(self, request):
        """ User Register post method"""
        clean_data = custom_validation(request.data)
        serializer = UserRegisterSerializer(data=clean_data)
        if serializer.is_valid(raise_exception=True):
            user = serializer.create(clean_data)
            if user:
                return Response({'user': serializer.data, 'message': "register successful"}, status=status.HTTP_201_CREATED)
        return Response(status=status.HTTP_400_BAD_REQUEST)


class UserLogout(APIView):
    """    View for user logout    """
    permission_classes = (permissions.IsAuthenticated,)
    authentication_classes = [JWTAuthentication]

    def post(self, request):
        """ User Logout method """
        try:
            logout(request)
            response = Response(
                {'message': 'logout successfully'}, status=status.HTTP_200_OK)
            # Delete cookies upon logout
            response.delete_cookie('refresh_token')
            response.delete_cookie('access_token')

            return response
        except Exception as e:
            return Response({'error': str(e)}, status=status.HTTP_400_BAD_REQUEST)


class LoginView(APIView):
    """    View for user login    """
    permission_classes = (permissions.AllowAny,)

    def post(self, request):
        """ User Login post method"""
        data = request.data
        assert validate_email(data)
        assert validate_password(data)
        serializer = UserLoginSerializer(data=data)
        if serializer.is_valid(raise_exception=True):
            user = serializer.check_user(data)
            login(request, user)
            tokens = generate_tokens(user)
            response = Response({'user': serializer.data,
                                'message': "login successful"}, status=status.HTTP_200_OK)
            response.set_cookie(key='refresh_token',
                                value=tokens['refresh'], httponly=True)
            response.set_cookie(key='access_token',
                                value=tokens['access'], httponly=True)
            return response


class UserView(APIView):
    """    View for getting user details    """
    permission_classes = (permissions.IsAuthenticated,)
    authentication_classes = [JWTAuthentication]

    def get(self, request):
        """ User Detail get method """
        print('User:', request.user)
        serializer = UserSerializer(request.user)
        return Response({'user': serializer.data, 'message': 'Details successful'}, status=status.HTTP_200_OK)
Step 4: Create API endpoints for our Backend
So, go to the settings.py file and add these lines:
# allow all for at this moment
ALLOWED_HOSTS = ['*']
# allow these port for cors origin
CORS_ALLOWED_ORIGINS = [
    'http://localhost:5173',
    'http://127.0.0.1:5173',
    'http://0.0.0.0:5173',
]

CORS_ALLOW_CREDENTIALS = True
INSTALLED_APPS = [
    'django.contrib.admin',
    'django.contrib.auth',
    'django.contrib.contenttypes',
    'django.contrib.sessions',
    'django.contrib.messages',
    'django.contrib.staticfiles',
    'rest_framework', # add these lines
    'corsheaders', # also cors
    'DApi' # apps
]
# ensure the auth user model is our customuser model
AUTH_USER_MODEL = 'DApi.CustomUser'
REST_FRAMEWORK = {
    'DEFAULT_PERMISSION_CLASSES': (
        'rest_framework.permissions.IsAuthenticated',
    ),
    'DEFAULT_AUTHENTICATION_CLASSES': (
        'rest_framework_simplejwt.authentication.JWTAuthentication',
    ),
}

from datetime import timedelta

# make our token lifetime to a week
SIMPLE_JWT = {
    'ACCESS_TOKEN_LIFETIME': timedelta(days=7),
    'REFRESH_TOKEN_LIFETIME': timedelta(days=14),
    'ROTATE_REFRESH_TOKENS': True,
    'BLACKLIST_AFTER_ROTATION': True,
    # Add this line to include 'Authorization' header
    'AUTH_HEADER_TYPES': (*default_headers, 'Bearer'),
}
And that's all we need to prepare for our backend. So now let's go to the frontend.
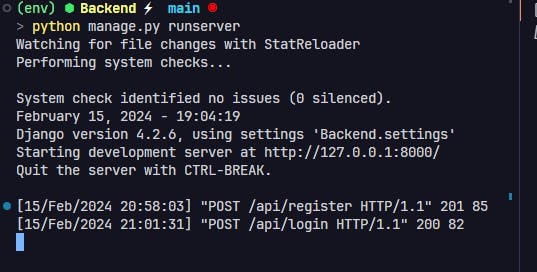
So, we can test our Django project after we done some preparations. Go to the C:\Users\hanht\Desktop\Dlentron\Dlentron\python\Backend folder and type these commands.
⬢ Backend ◉
> python .\manage.py makemigrations
> python .\manage.py migrate
> python .\manage.py runserver
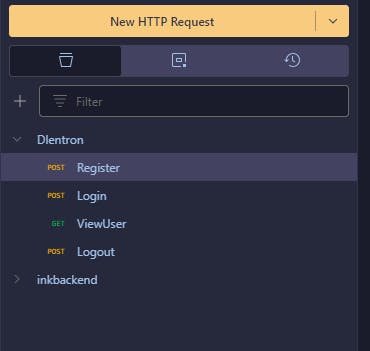
After that we must test our API to make sure working properly. So, create collection in our postman and create four requests for our projects; one for login, one for register, one for view user details and lastly for logout.
And we will add this URL to our Register request file and add the body also make sure to change the method to POST:
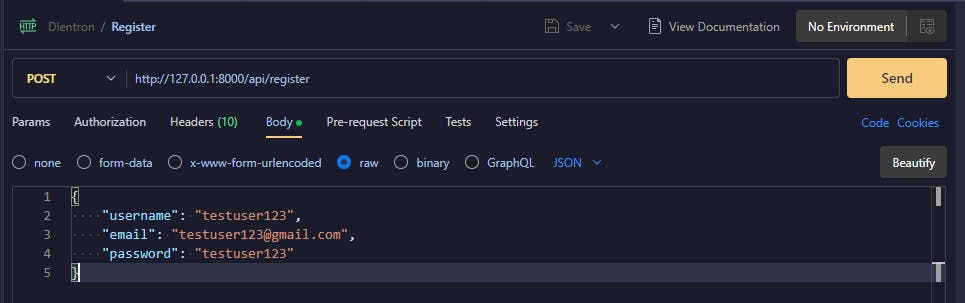
And we will send the request to our backend server by send button:

And we can see the user have been created successfully. And now we will move to the login process and it will return the tokens.

And next we will request in our user view api.

We don't need to add the token to authorization because we included those tokens in the cookies.

And we will try the logout function:
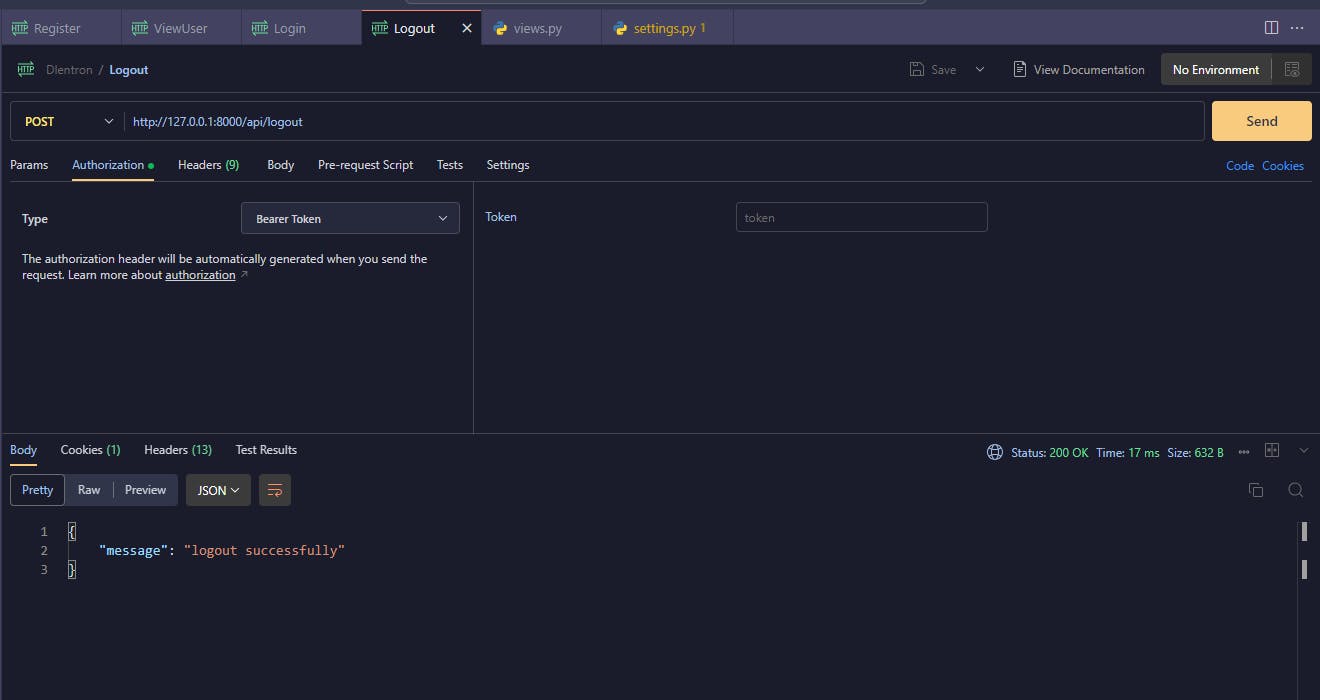
When we log out our account it will remove our tokens from cookies also.
Step 5: Connect the electron and Django via URLs
To connect the electron and Django together, we need API endpoints between them but we did the Django API endpoints so we only needed to create the axios request in our electron JS. So, we need to go back to our electron project folder.
But before writing the those functions, we need to install these dependencies as shown below.
npm i axios react-router-dom@latest boostrap react-bootstrap tree-kill
To continue above.
(env) ⬢ Backend ◉
> pwd
Path
----
C:\Users\hanht\Desktop\Dlentron\Dlentron\python\Backend

(env) ⬢ Backend ◉
> cd ../..
> cd .\src\renderer\src\
> pwd
Path
----
C:\Users\hanht\Desktop\Dlentron\Dlentron\src\renderer\src
So we will create the new file called requestJS.ts in our src folder from renderer.
New-Item -Path . -Name "requestJS.ts" -ItemType "file"
And we will define Axios defaults configurations like this in our requestJS.ts like this:
import axios, { AxiosRequestConfig, AxiosResponse } from 'axios'

axios.defaults.withCredentials = true
axios.defaults.xsrfCookieName = 'csrftoken'
axios.defaults.xsrfHeaderName = 'X-CSRFToken'

const requestClient = axios.create({
  baseURL: 'http://127.0.0.1:8000/'
})
After that we need to define these functions and interfaces to request to our backend server.
First one we need is to create the interface for our return data:
interface LoginResponseData {
  tokens: { access: string }
  user: any
  message: string
}
interface RegisterResponseData {
  user: any
  message: string
}
interface RequestFunctionResponse {
  response: any
  success: boolean
}
And afterward, we will create the functions for store and retrieve our tokens:
export function saveUserData(userData: any): void {
  localStorage.setItem('userData', JSON.stringify(userData))
}

// this function will be used in another post
export function getToken() {
  const cookiesJson = localStorage.getItem('cookies')
  if (cookiesJson) {
    const cookies = JSON.parse(cookiesJson)
    const auth_token = cookies?.[1]?.value || ''
    if (auth_token.length !== 0) {
      return auth_token
    } else {
      return ''
    }
  } else {
    return ''
  }
}

function handleError(error: any): string {
  return (error as Error).message || 'An error occurred'
}
And next, we will create the Login, Register and User view request functions in below:
export const loginFunction = async (
  email: string,
  password: string
): Promise<RequestFunctionResponse> => {
  try {
    if (email === '' || password === '') {
      throw new Error("Email and password can't be empty")
    }
    const res: AxiosResponse<LoginResponseData> = await requestClient.post('/api/login', {
      email,
      password
    })
    // save the cookies in local storage
    window.electron.saveCookies()
    const { user, message } = res.data
    if (user) {
      saveUserData(user)
    }
    return { response: message, success: true }
  } catch (error) {
    return { response: handleError(error), success: false }
  }
}

export const registerFunction = async (
  username: string,
  email: string,
  password: string,
  password2: string
): Promise<RequestFunctionResponse> => {
  try {
    if (email === '' || password === '' || username === '') {
      throw new Error("Email, Username, and Password can't be empty")
    }
    if (password !== password2) {
      throw new Error('Both passwords must be the same.')
    }
    const res: AxiosResponse<RegisterResponseData> = await requestClient.post('/api/register', {
      username,
      email,
      password
    })
    const { user, message } = res.data
    if (user) {
      saveUserData(user)
    }
    return { response: message, success: true }
  } catch (error) {
    return { response: handleError(error), success: false }
  }
}

export const get = async (url: string): Promise<RequestFunctionResponse> => {
  try {
    const token = getToken()
    if (!token) {
      throw new Error('Authentication token not set')
    }
    const config: AxiosRequestConfig = {
      headers: {
        Authorization: `Bearer ${token}`
      }
    }
    const res = await requestClient.get(url, config)
    return { response: res.data.message, success: true }
  } catch (error) {
    return { response: handleError(error), success: false }
  }
}

export const post = async (
  url: string,
  data: Record<string, any>
): Promise<RequestFunctionResponse> => {
  try {
    const token = getToken()
    if (!token) {
      throw new Error('Authentication token not set')
    }
    const config: AxiosRequestConfig = {
      headers: {
        Authorization: `Bearer ${token}`
      }
    }
    const res = await requestClient.post(url, data, config)
    return { response: res.data.message, success: true }
  } catch (error) {
    return { response: handleError(error), success: false }
  }
}

// check token function method
export async function checkToken(): Promise<RequestFunctionResponse> {
  try {
    const token = getToken()
    if (!token) {
      throw new Error('Authentication token not set')
    }
    const config: AxiosRequestConfig = {
      headers: {
        Authorization: `Bearer ${token}`
      }
    }
    const res = await requestClient.get('/api/check-token', config)
    return { response: res.data.message, success: true }
  } catch (error) {
    return { response: handleError(error), success: false }
  }
}
And we will create the Authenticate.tsx in our src folder for login and registration:
> pwd
C:\Users\hanht\Desktop\Dlentron\Dlentron
> cd .\src\renderer\src\components\
> New-Item -Path . -Name "Authenticate.tsx" -ItemType "file"
And we will create the three React Arrow Function Components like this:
import React from 'react'

const Authenticate = () => {
  return <div>test</div>
}

const LoginForm = () => {
  return <div>test</div>
}

const RegisterForm = () => {
  return <div>test</div>
}

export default Authenticate
And we will add the toggle button that will show login or register components based on toggle.
import { loginFunction, registerFunction } from '@renderer/requestJS'
import { useState } from 'react'
import Button from 'react-bootstrap/Button'
import Form from 'react-bootstrap/Form'

const Authenticate = () => {
  const [isLogin, setIsLogin] = useState(false)
  const toggleAuthMode = () => {
    setIsLogin((prevState) => !prevState)
  }
  return (
    <div className="d-flex flex-column gap-3 card-xl">
      <Button variant="secondary" type="button" onClick={toggleAuthMode}>
        {isLogin ? 'Switch to Register' : 'Switch to Login'}
      </Button>
      {isLogin ? <LoginForm /> : <RegisterForm />}
    </div>
  )
}
And we will add the form in each login and register component.
const LoginForm = () => {
const [email, setEmail] = useState('')
const [password, setPassword] = useState('')
const handleSubmit = async (event) => {
event.preventDefault()
try {
const { success, response } = await loginFunction(email, password)
if (success) {
console.log(response)
} else {
console.log(response)
}
} catch (error) {
console.error('Error during login:', error)
}
}
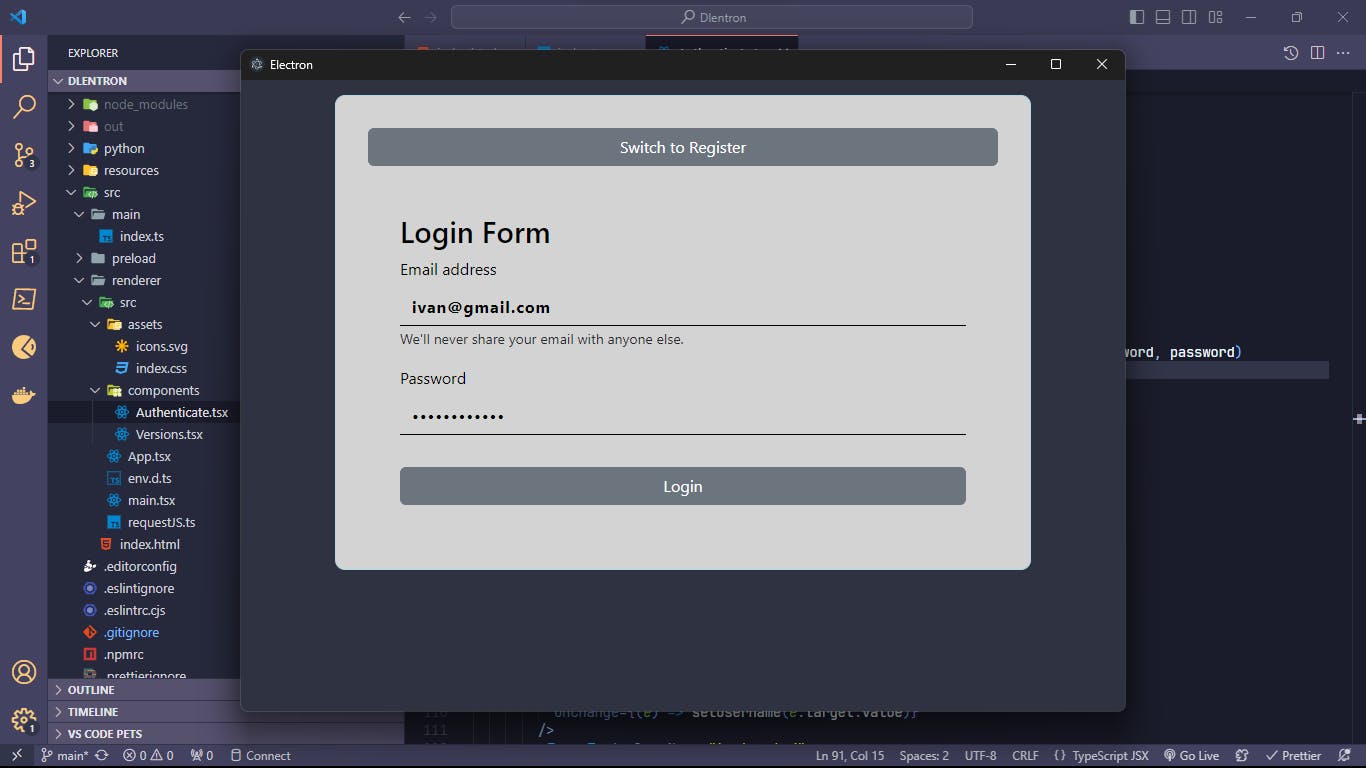
return (
<Form onSubmit={handleSubmit} className="card">
<h2>Login Form</h2>
<Form.Group className="mb-3" controlId="formBasicEmail">
<Form.Label>Email address</Form.Label>
<Form.Control
type="email"
placeholder="Enter email"
value={email}
onChange={(e) => setEmail(e.target.value)}
/>
<Form.Text className="text-muted">We'll never share your email with anyone else.</Form.Text>
</Form.Group>
<Form.Group className="mb-3" controlId="formBasicPassword">
<Form.Label>Password</Form.Label>
<Form.Control
type="password"
placeholder="Password"
value={password}
onChange={(e) => setPassword(e.target.value)}
/>
</Form.Group>
<Button variant="secondary" type="submit" className="mt-3">
Login
</Button>
</Form>
)
}
In register component.
const RegisterForm = () => {
const [username, setUsername] = useState('')
const [email, setEmail] = useState('')
const [password, setPassword] = useState('')
const handleSubmit = async (event) => {
event.preventDefault()
try {
const { success, response } = await registerFunction(username, email, password, password)
if (success) {
console.log(response)
} else {
console.log(response)
}
} catch (error) {
console.error('Error during register:', error)
}
}
return (
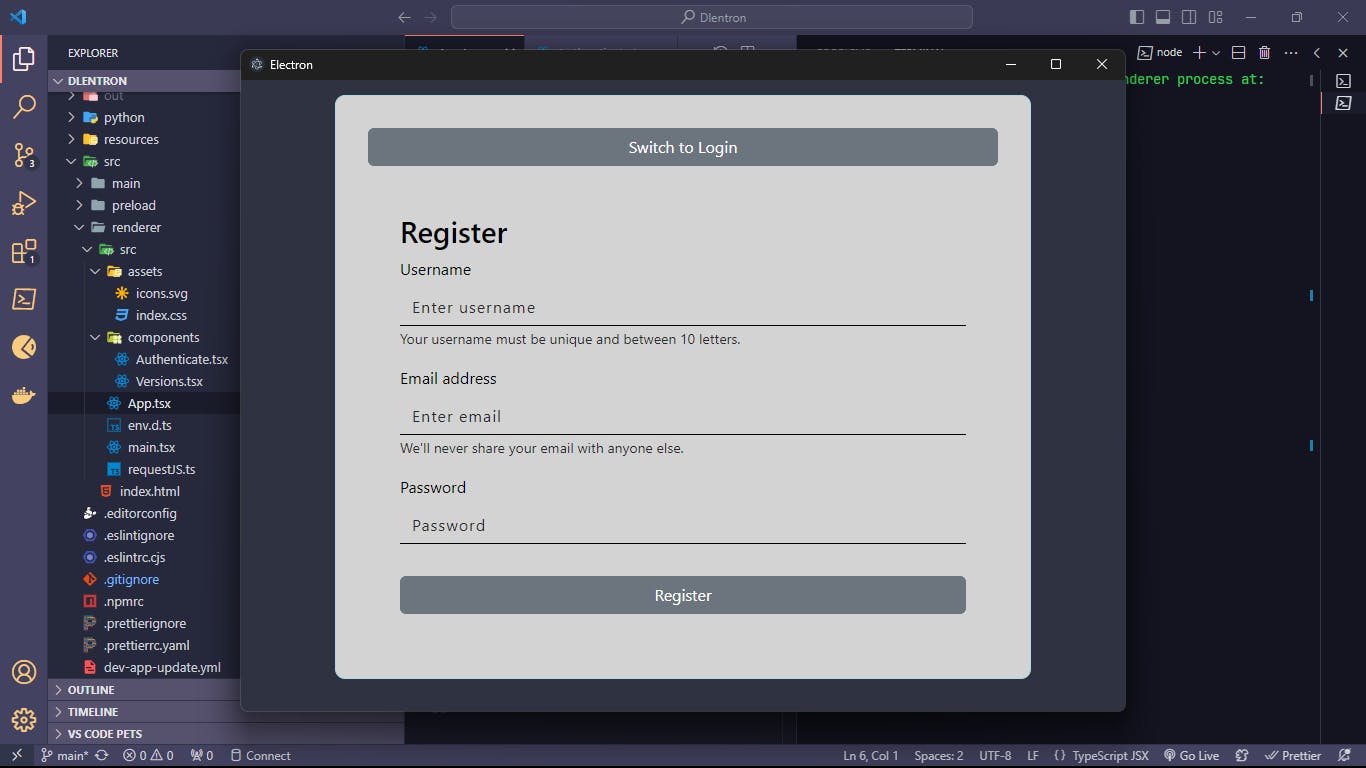
<Form onSubmit={handleSubmit} className="card">
<h2>Register</h2>
<Form.Group className="mb-3" controlId="formBasicEmail">
<Form.Label>Username</Form.Label>
<Form.Control
type="text"
placeholder="Enter username"
value={username}
onChange={(e) => setUsername(e.target.value)}
/>
<Form.Text className="text-muted">
Your username must be unique and between 10 letters.
</Form.Text>
</Form.Group>
<Form.Group className="mb-3" controlId="formBasicEmail">
<Form.Label>Email address</Form.Label>
<Form.Control
type="email"
placeholder="Enter email"
value={email}
onChange={(e) => setEmail(e.target.value)}
/>
<Form.Text className="text-muted">We'll never share your email with anyone else.</Form.Text>
</Form.Group>
<Form.Group className="mb-3" controlId="formBasicPassword">
<Form.Label>Password</Form.Label>
<Form.Control
type="password"
placeholder="Password"
value={password}
onChange={(e) => setPassword(e.target.value)}
/>
</Form.Group>
<Button variant="secondary" type="submit" className="mt-3">
Register
</Button>
</Form>
)
}
After we make our Authenticate component, we need add that in our App.tsx file so like this:
import Authenticate from './components/Authenticate'
import 'bootstrap/dist/css/bootstrap.min.css'
import 'bootstrap/dist/js/bootstrap.bundle.min'

function App(): JSX.Element {
  return (
    <div className="container">
      <Authenticate />
    </div>
  )
}

export default App
And now, we will demonstrate our application so type these in your terminal:
> cd ../../../../
> npm run dev
And we will see our application like this, if not please check your file and re-read the document again. 😉
Oops, I forgot to add the style.css so if your form is not same like mine you can copy my style.css in this link: 😁
Before demonstrate our application, we must need to disable our websecurity in our index.ts which is in src/main folder:
webPreferences: {
      preload: join(__dirname, '../preload/index.js'),
      sandbox: false,
      webSecurity: false,
      nodeIntegration: true,
      allowRunningInsecureContent: true
    },
Also, don't forget to run the python manage.py also. 👻
Before register, please also check your login component by clicking the switch to login.

And you will see this error:

But don't worry too much, it is because the electron prevents cross-site scripting (XSS) and others. And, our connection violates the Content Security Policy directive 'default-src 'self'. But we can fix that in our index.html file by adding this line in our header meta tag.
<meta http-equiv="Content-Security-Policy" content="default-src 'self'; script-src 'self'; style-src 'self' 'unsafe-inline';connect-src 'self' http://127.0.0.1:8000/ 'unsafe-eval'" />
And that is. So let's create our user again and see the result.
Baammm, we got the successful response from our backend server.

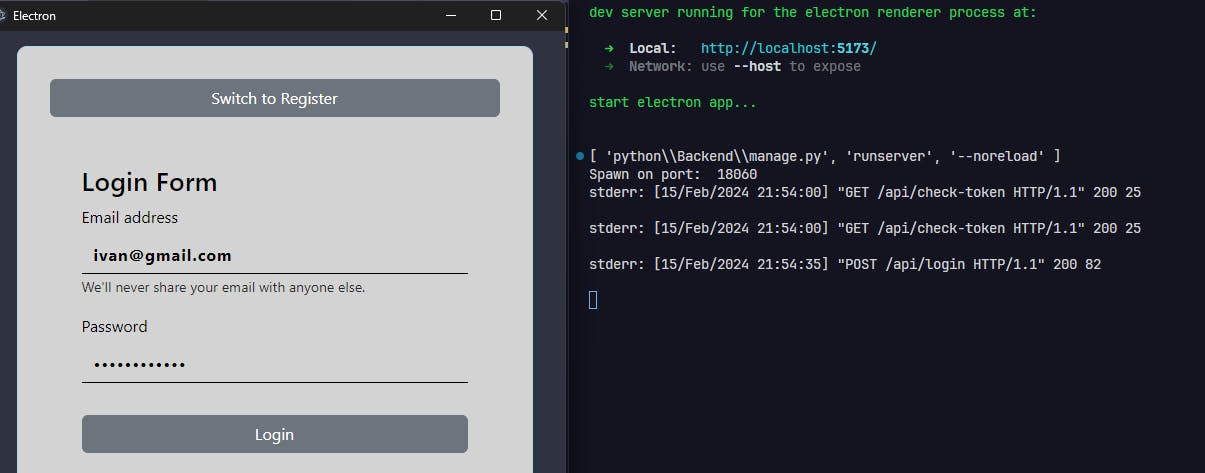
So, we will go to the login tab by clicking the button from above of form, and try to login with our user email and password.
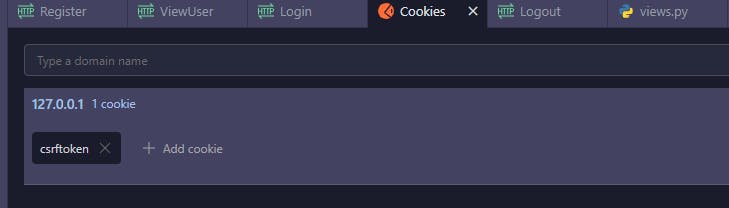
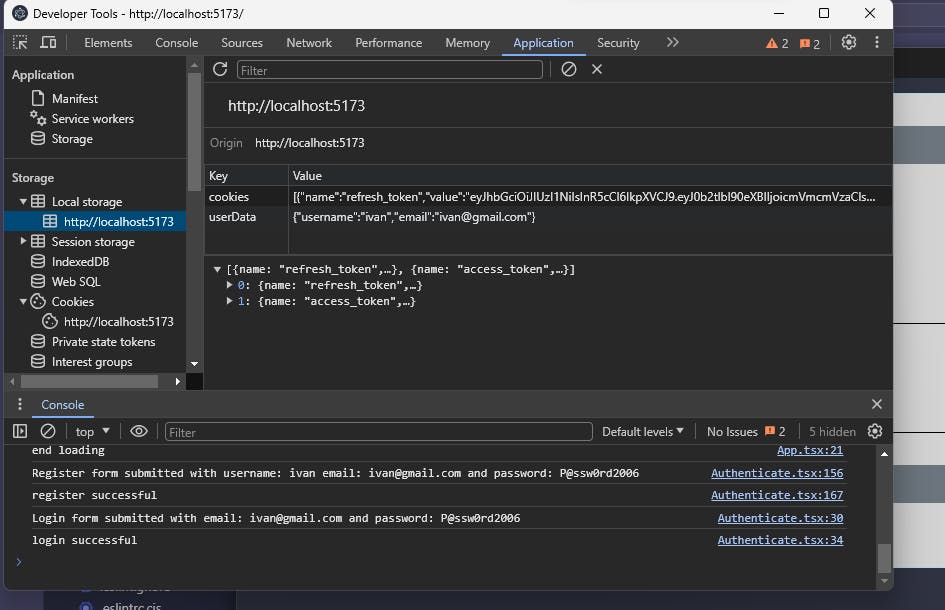
And the login is also success. Plus, when we also check our cookies, we can see that new cookies (access_token, refresh_token) has been appended.
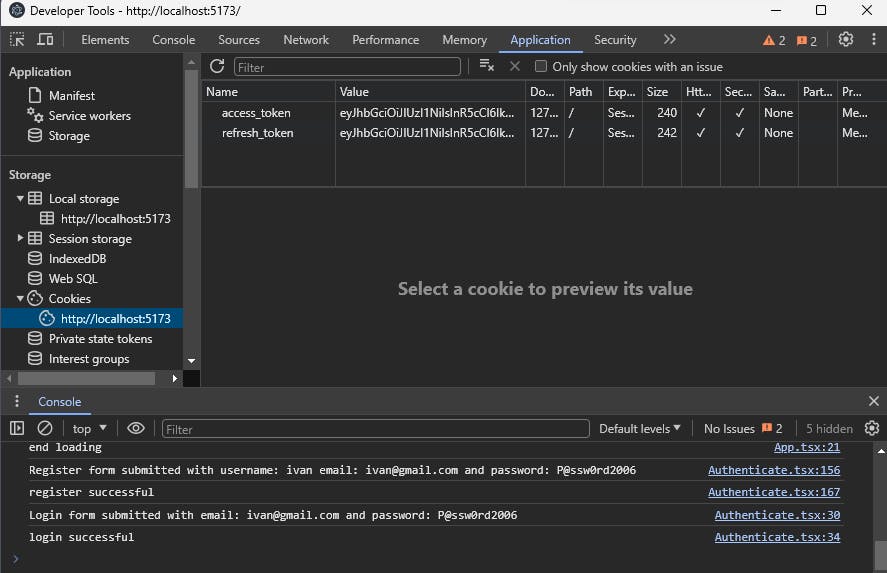
Plus we can see our data has been saved in local storage also.
Step 6: Run Backend with the Frontend Together
Just like the step label, we will now run our backend server with the front end together.
So to do that, the first thing we need to know before writing is that we installed the tree-kill with npm in the above step, so we will use this package to run and stop our backend server.
So, to write this, we need to open our index.ts in our src/main folder and write some functions.
// add these lines while import
import path, { join } from 'path'
import { ChildProcessWithoutNullStreams, spawn } from 'child_process'
const kill = require('tree-kill')

// and we will declare our django backend process
let BACKEND_PROCESS: ChildProcessWithoutNullStreams

// Create the check environment function
const isDevelopmentEnv = () => {
  return process.env.NODE_ENV === 'development'
}

// get the application path to get the application location while in prod
const appPath = app.getAppPath();
const userDataPath = app.getPath('userData');

// We will created the function that will spawn our backend server
const spawnDjango = () => {
  const djangoArgs = isDevelopmentEnv()
    ? ['python\\Backend\\manage.py', 'runserver', '--noreload']
    : ['inkBackend.exe', 'runserver', '--noreload']

  const spawnOptions = {
    cwd: isDevelopmentEnv() ? path.dirname(appPath) : userDataPath,
    shell: true
  }

  return spawn('python', djangoArgs, spawnOptions)
}

const startBackendServer = () => {
  BACKEND_PROCESS = spawnDjango()
  BACKEND_PROCESS.stdout.on('data', (data) => {
    console.log(`stdout: ${data}`)
  })
  BACKEND_PROCESS.stderr.on('data', (data) => {
    console.error(`stderr: ${data}`)
  })
  BACKEND_PROCESS.on('error', (error) => {
    console.error(`error: ${error.message}`)
  })
  BACKEND_PROCESS.on('close', (code) => {
    console.log(`child process exited with code: ${code}`)
  })
  return BACKEND_PROCESS
}
After that we will add our startBackendServer function in our createWindow function.
function createWindow(): void {
  // start the backend
  startBackendServer()
  // show the port running on
  console.log('Spawn on port: ', BACKEND_PROCESS.pid)
  // Create the browser window.
  const mainWindow = new BrowserWindow({
    width: 900,
    height: 670,
    show: false,
    autoHideMenuBar: true,
    ...(process.platform === 'linux' ? { icon } : {}),
    webPreferences: {
      preload: join(__dirname, '../preload/index.js'),
      sandbox: false,
      webSecurity: false,
      nodeIntegration: true,
      allowRunningInsecureContent: true
    },
    center: true
  })
   .......
}
Plus, we must not forget to close our Backend server with the Frontend application, so we need to add these lines to make sure it stopped at our application quit.
app.on('before-quit', async () => {
  console.log('Ending our backend server.')
  kill(BACKEND_PROCESS.pid)
})
// Quit when all windows are closed, except on macOS. There, it's common
// for applications and their menu bar to stay active until the user quits
// explicitly with Cmd + Q.
app.on('window-all-closed', () => {
  if (process.platform !== 'darwin') {
    app.quit()
  }
  console.log('Ending our backend server darwin.')
  kill(BACKEND_PROCESS.pid)
})
And as the result, we can see the our frontend app can spawn our backend server as ease.
And we will try to close it.
Before closing:
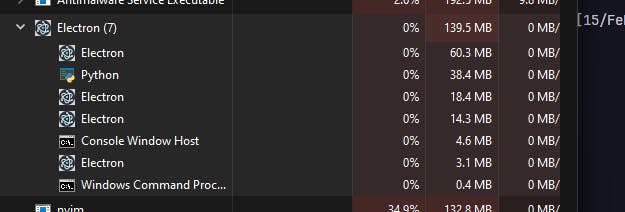
After closing, it does not have the python anymore.


So to conclude, we have created our raw offline authentication app with Django and Electron-Vite. Although it may have some problems at first we can say that our backend server Django and electron frontend have successfully interacted in realtime. Additionally, we can use the HashRouter for page routing / URL routing and we can also upload our backend server online and change the app into an online app.
Therefore in the next blog, I will show how to convert this Electron-Vite + Django (Dlentron) app as an offline application and with the page routing.
GitHub Source Code Link: https://github.com/saihanhtet/Dlentron
Good Luck everyone, please also advice me if I need some changes. 🥰🍀